Table of contents
Granaroma User Manual
Machine overview
Control panel
Introduction
Before first use
Special functions
Brewing drinks
Personalizing drinks
Adjusting machine settings
AquaClean water filter
Removing and inserting the brew group
Cleaning and maintenance
Descaling procedure
Error codes
Ordering accessories
Troubleshooting
Technical specifications
GranaromaUser Manual
Cleaning and maintenance
Regular cleaning and maintenance keeps your machine in top condition and ensures good-tasting coffee for a long time with a steady coffee flow.
Consult the table below for a detailed description on when and how to clean all detachable parts of the machine. You can find more detailed information and video instructions on www.saeco.com/care. See figure C for an overview of which parts can be cleaned in the dishwasher.
| Detachable parts | When to clean | How to clean |
|---|---|---|
| Brew group | Weekly | Remove the brew group from the machine. Rinse it under the tap. |
| Monthly | Clean the brew group with the Philips coffee oil remover tablet. | |
| Milk system/internal cappuccinatore | After every day of use | Perform the 'HygieSteam' program in the cleaning menu. Select 'HygieSteam' in the cleaning menu and follow the instructions on the screen. Wipe the outside of the metal milk tube with a damp cloth before placing it into the milk tube holder. |
| Weekly | Remove and disassemble the internal cappuccinatore (see 'Cleaning the internal cappuccinatore under the tap'). Rinse all parts under the tap with some washing-up liquid. | |
| Monthly | Perform the 'Deep Milk Clean' procedure with the Philips milk circuit cleaner. Select 'Deep Milk Clean' in the cleaning menu and follow the instructions on the screen. Go to www.saeco.com/care for detailed video instructions. | |
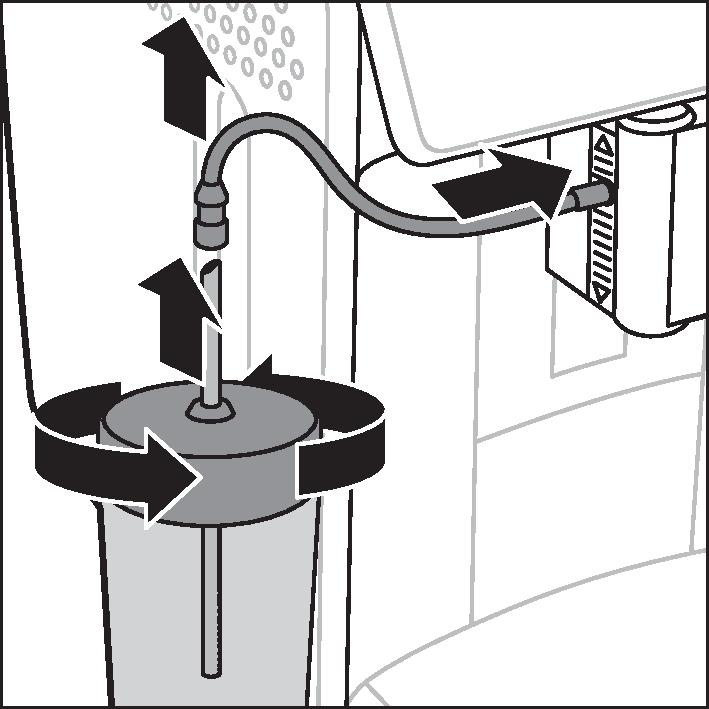
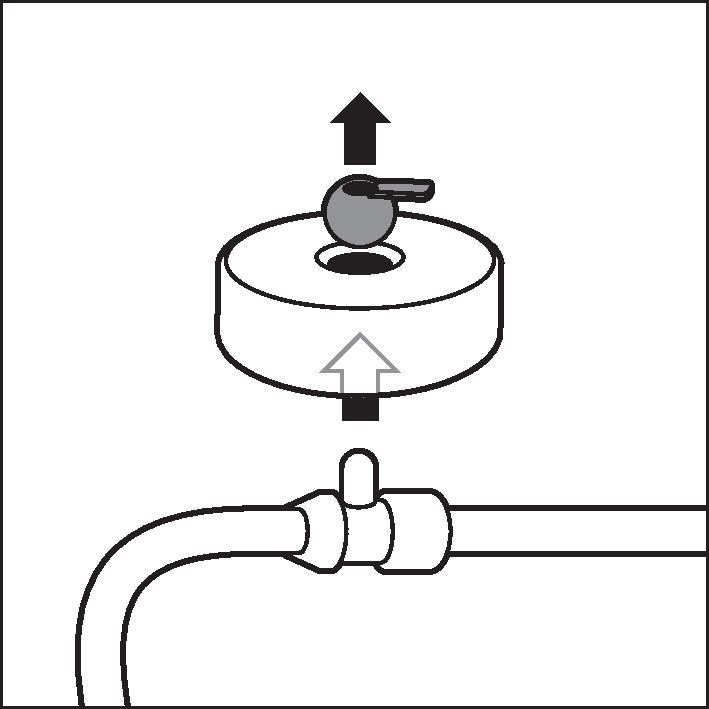
| Milk container | Weekly | Disassemble the milk container and push out the ball using the pin of the milk tube. Clean all parts of the milk container under the tap or in the dishwasher |
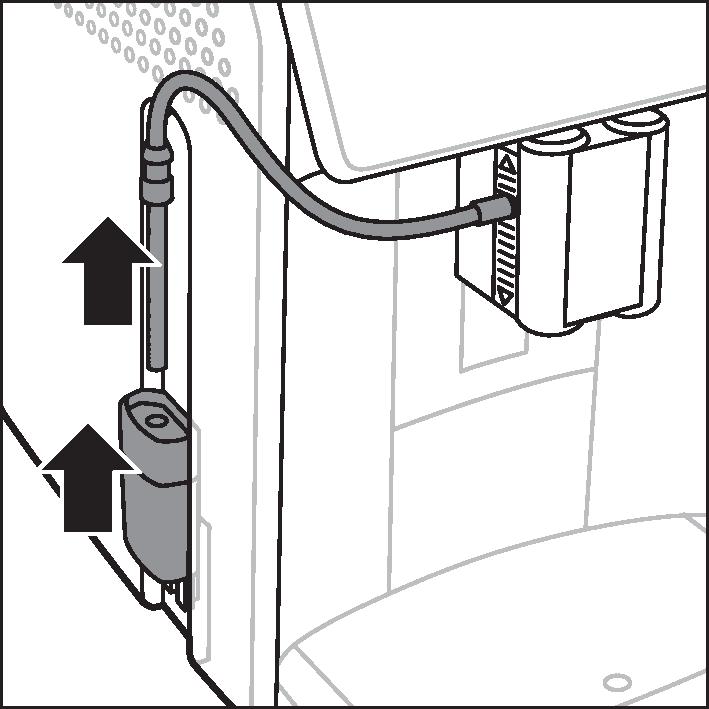
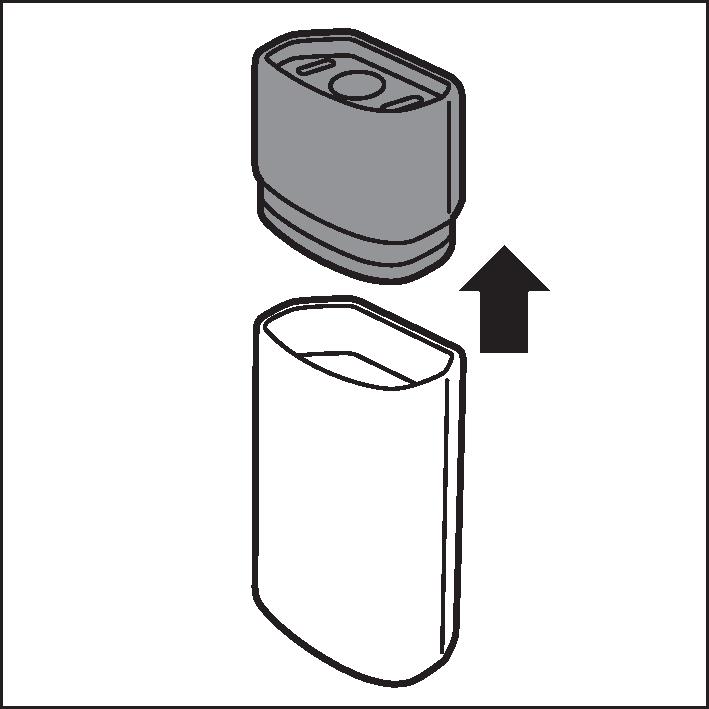
| HygieSteam container (milk tube holder) | Weekly or when the machine reminds you | Remove the HygieSteam container from the machine and remove the HygieSteam cover. Empty the HygieSteam container and clean the container and cover under the tap or in the dishwasher. Let the container and cover air-dry and place them back in the machine. |
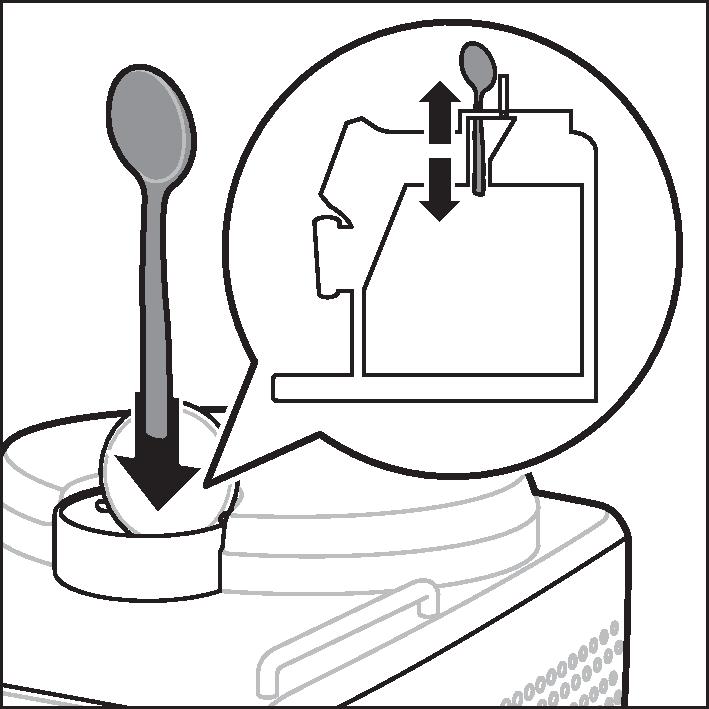
| Pre-ground coffee compartment | Check the pre-ground coffee compartment weekly to see if it is clogged. | Unplug the machine and remove the brew group. Open the lid of the pre-ground coffee compartment and insert the spoon handle into it. Move the handle up and down until the clogged ground coffee falls down. Go to www.saeco.com/care for detailed video instructions. |
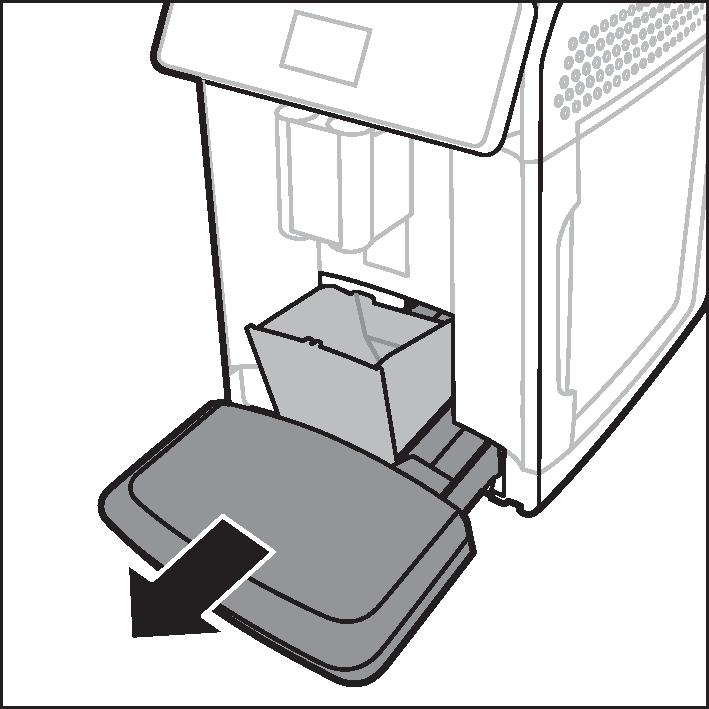
| Coffee grounds container | Empty the coffee grounds container when prompted by the machine. Clean it weekly. | Remove the coffee grounds container while the machine is switched on. Rinse it under the tap with some washing-up liquid or clean it in the dishwasher. The front panel of the coffee grounds container (Fig. A18) is not dishwasher-safe. |
| Drip tray | Empty the drip tray daily or as soon as the red 'drip tray full' indicator pops up through the drip tray. Clean the drip tray weekly. | Remove the drip tray and rinse it under the tap with some washing-up liquid. You can also clean the drip tray and the drip tray cover in the dishwasher. The front panel of the coffee grounds container (Fig. A18) is not dishwasher-safe. |
| Lubrication of the brew group | Every 2 months | Lubricate the brew group with the by-packed grease. |
| Water tank | Weekly | Rinse the water tank under the tap |
| Machine front | Weekly | Clean with a non-abrasive cloth |

Cleaning the brew group
Regular cleaning of the brew group prevents coffee residues from clogging up the internal circuits. Visit www.saeco.com/care for support videos on how to remove, insert and clean the brew group.
Cleaning the brew group under the tap
2 Rinse the brew group thoroughly with water. Carefully clean the upper filter of the brew group.
3 Let the brew group air-dry before you place it back. Do not dry the brew group with a cloth to prevent fibers from collecting inside the brew group.
Cleaning the brew group with the coffee oil remover tablets
Only use Philips coffee oil remover tablets.
1 Tap the Clean
icon and use the up and down arrows to select 'Brew group clean'.


2 Tap the OK icon to confirm and then follow the instructions on the screen.
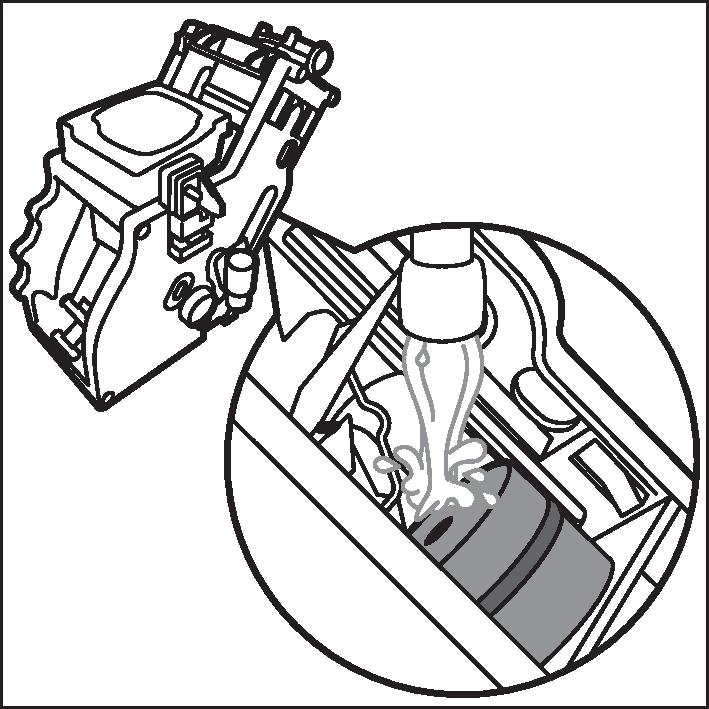
Lubricating the brew group
To improve your machine's performance, we suggest that you lubricate the brew group every 2 months, to ensure that the moving parts continue to move smoothly.
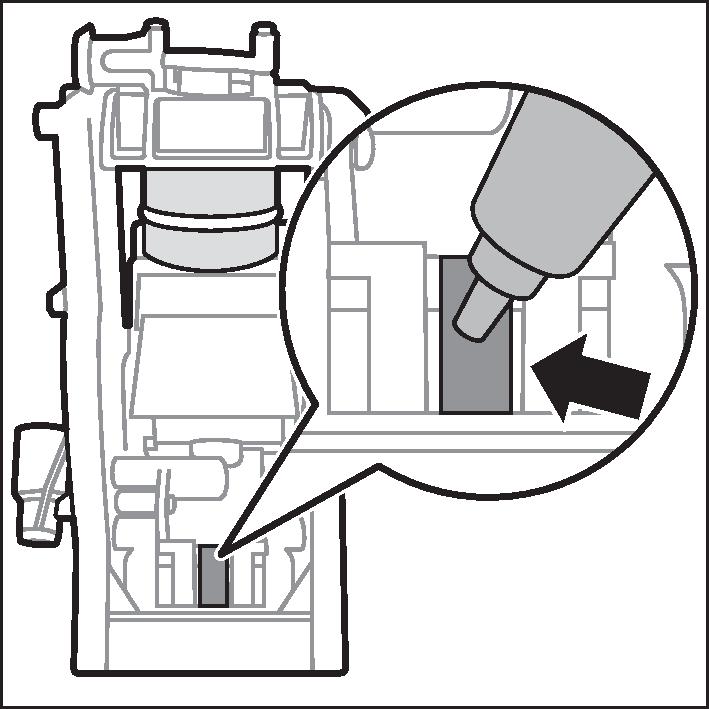
1 Apply a thin layer of grease on the piston (grey part) of the brew group.
2 Apply a thin layer of grease around the shaft (grey part) in the bottom of the brew group.
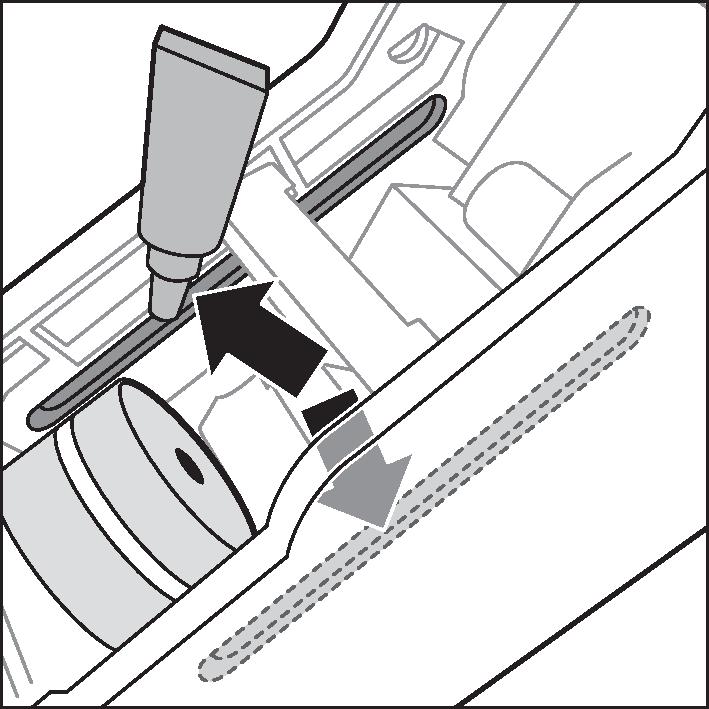
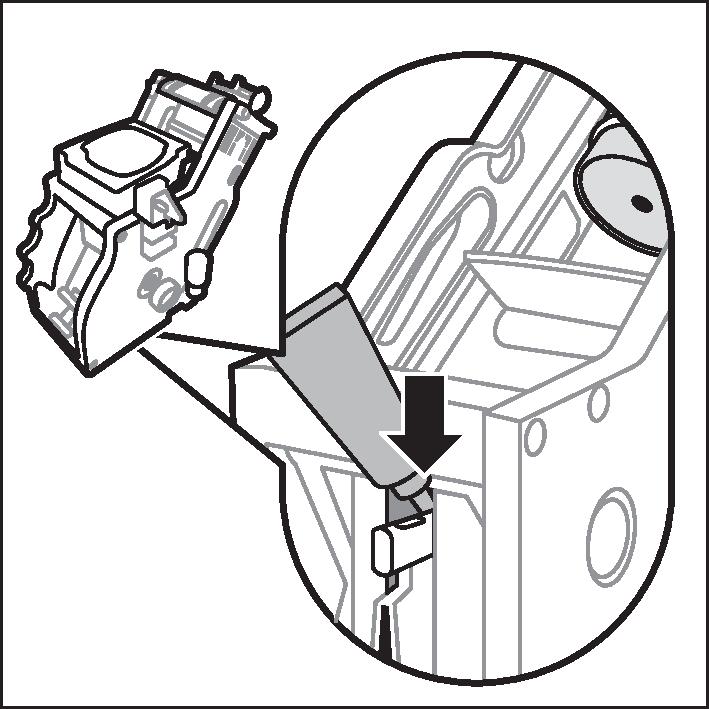
3 Apply a thin layer of grease to the guiding rails on both sides.
Cleaning programs for the internal cappuccinatore
The machines has three programs to clean the internal cappuccinatore:
- 'HygieSteam Shot': the machine shoots steam through the internal cappuccinatore to rinse it quickly.
- 'HygieSteam': the machine thoroughly cleans the internal milk system with steam. Make sure that the HygieSteam container is correctly assembled and attached to the machine. Place the milk tube in the milk tube holder and follow the instructions on the screen.
- 'Deep Milk Clean': Perform the 'Deep Milk Clean' procedure with the Philips milk circuit cleaner for a thorough cleaning of the internal milk system.
Cleaning the internal cappuccinatore under the tap
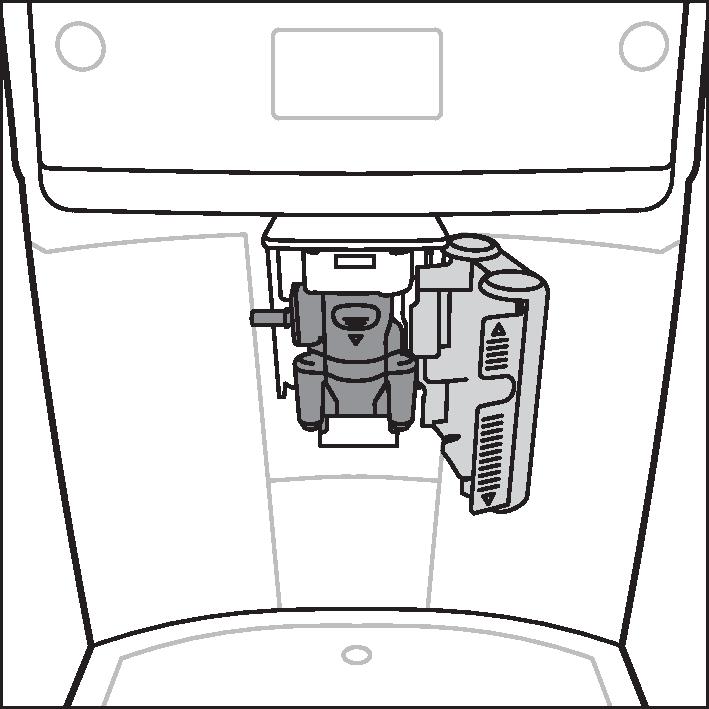
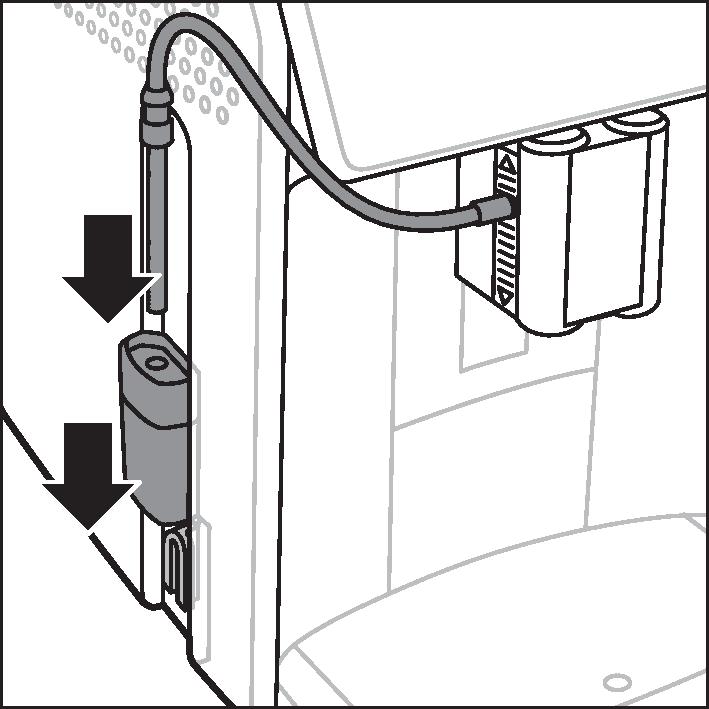
1 Open the door of the internal cappuccinatore.
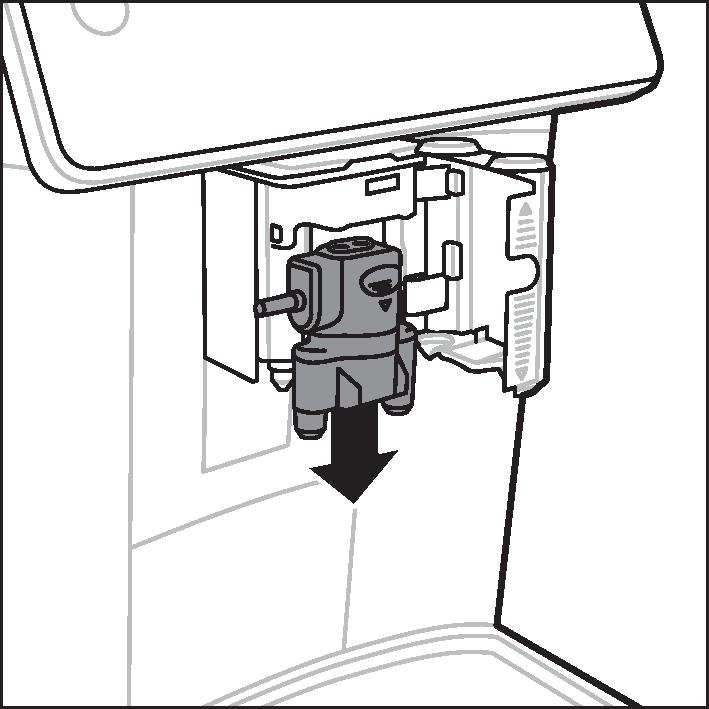
2 Remove the internal cappuccinatore by pulling it down.
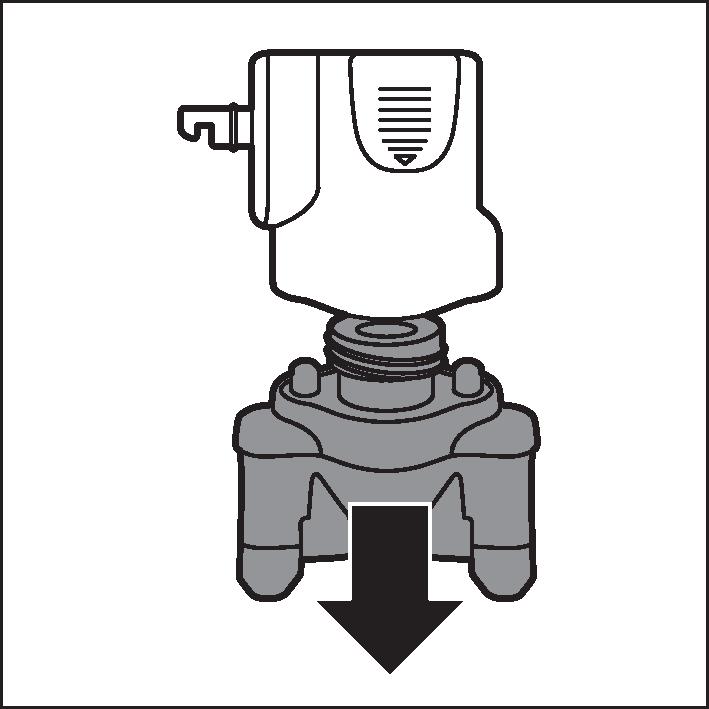
3 Disassemble the internal cappuccinatore by pulling the bottom part off the top part.
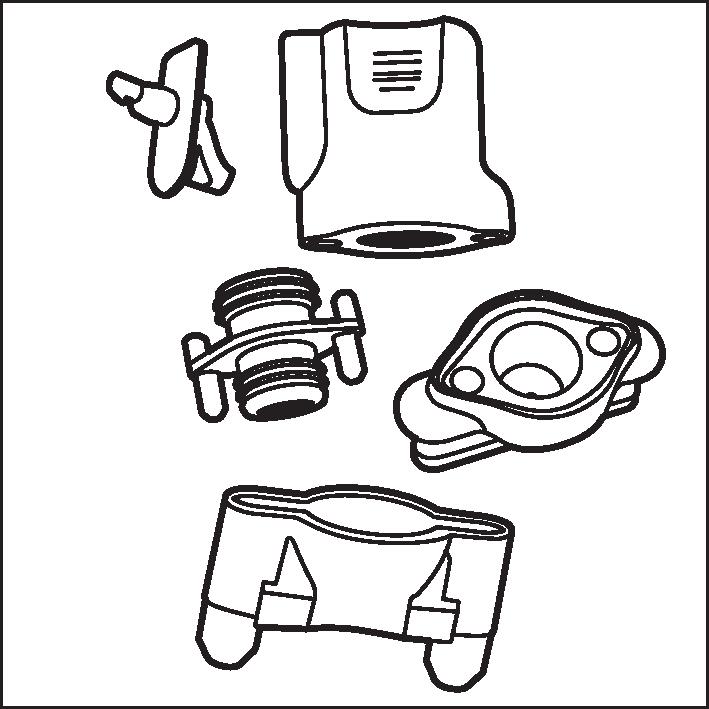
4 Disassemble all parts and clean them under the tap.
5 Reassemble the internal cappuccinatore.
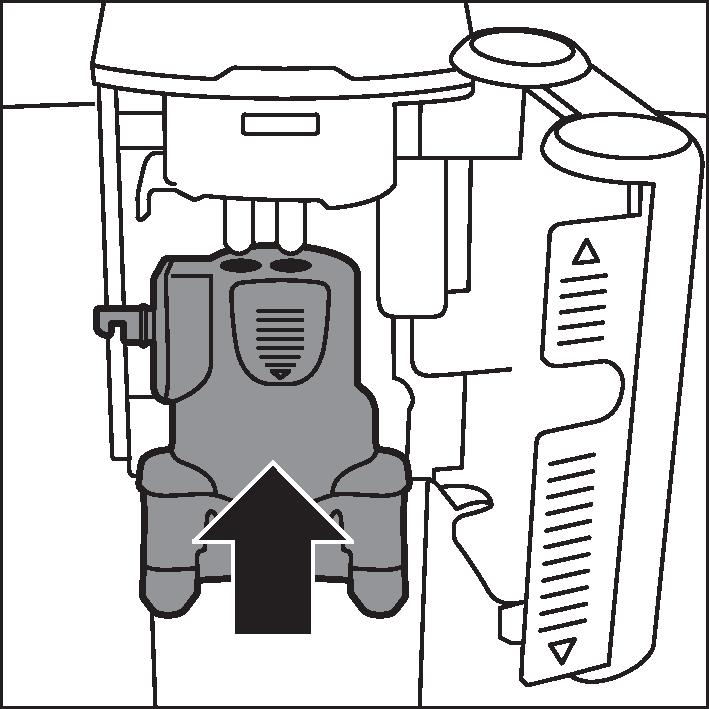
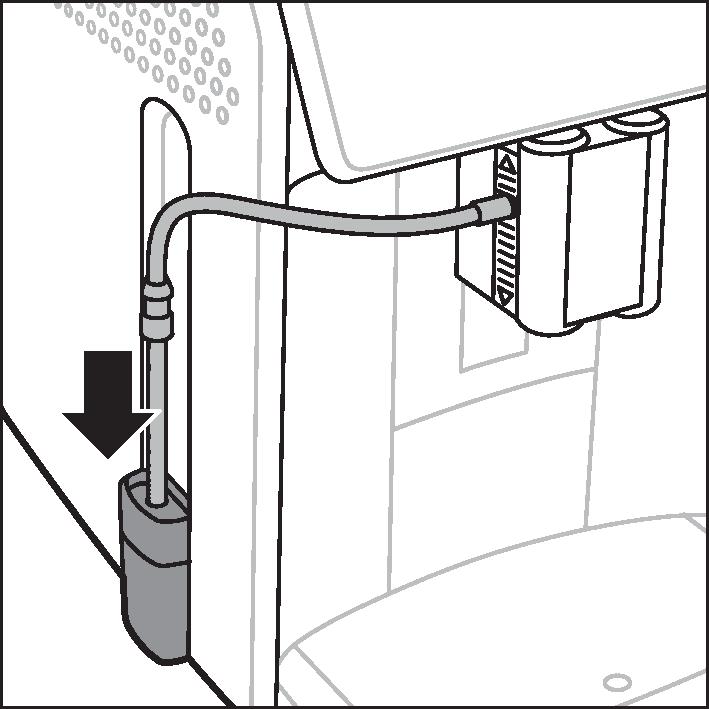
6 To place back the internal cappuccinatore, put it in upright position and make sure the holes are aligned with the two tubes on the machine. Then move the internal cappuccinatore upwards until it locks into place.
7 Close the door.